How to Upload Selected Photo to Icloud
Reading Time: 11 minutes read
Uploading photos to Apple's iCloud enables you lot to back-up your precious memories and easily admission photos wherever y'all are.
In this guide, nosotros'll explain how to upload photos to iCloud from iPhones, iPads, iPod touches, Macs and Windows PCs. We'll also explain the different options you have when storing photos on your devices, and troubleshoot common issues.
How to upload photos to iCloud from iPhone or iPad
Follow these simple steps to turn on iCloud and all your images will be automatically uploaded.
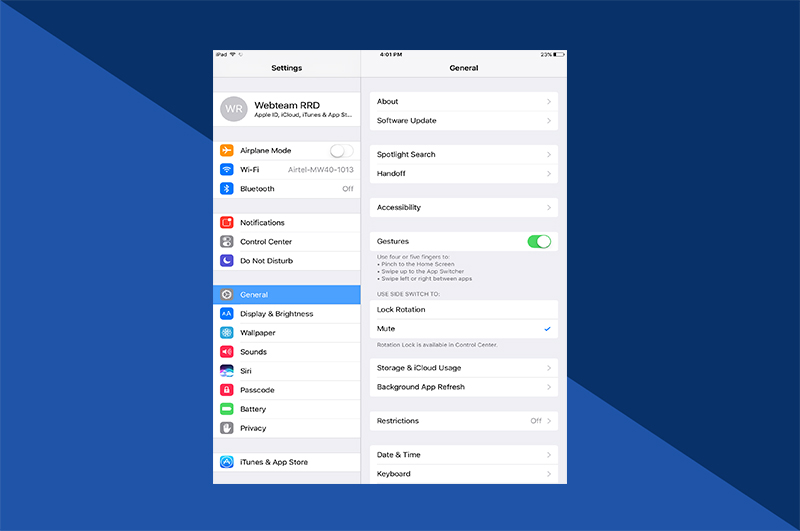
1. Go to Settings
This is the cog icon on your abode screen.
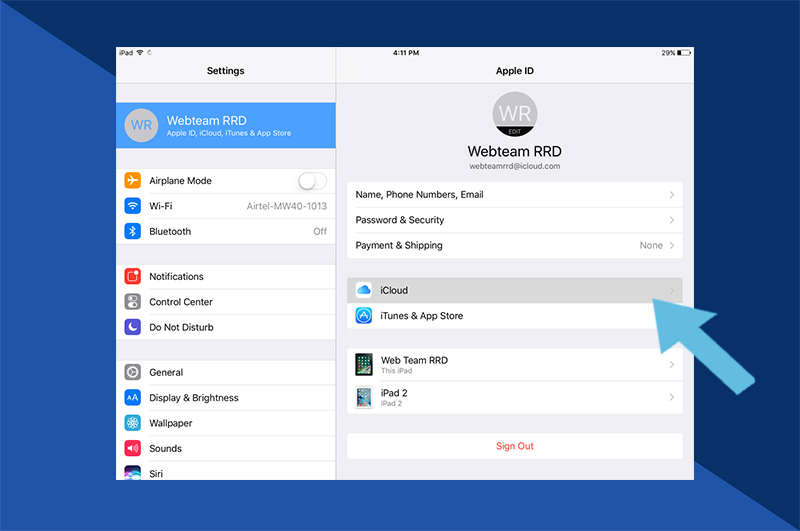
2. Select your name

3. Tap iCloud
4. Tap Photos
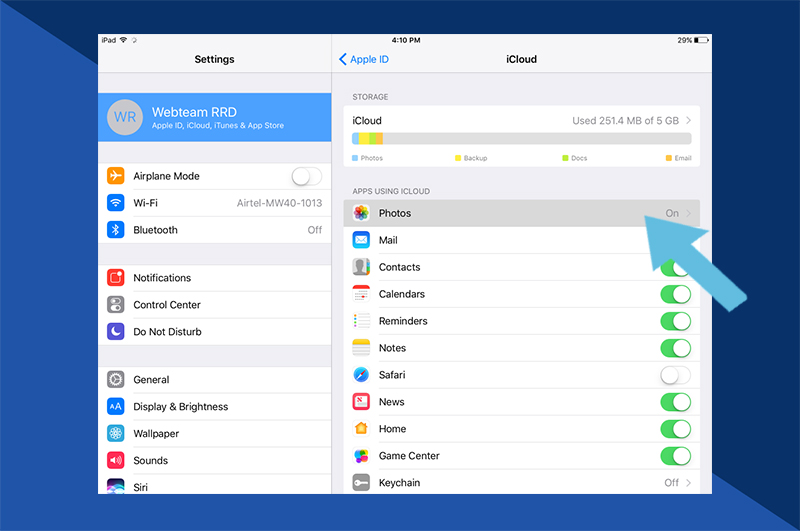
5. Turn on iCloud Photos
Make certain the button next iCloud Photos is greenish. Merely tap it to alter colour.
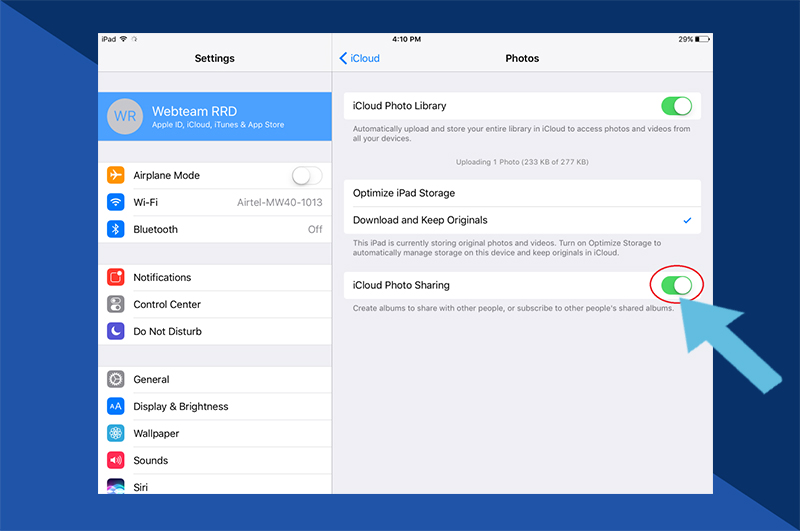
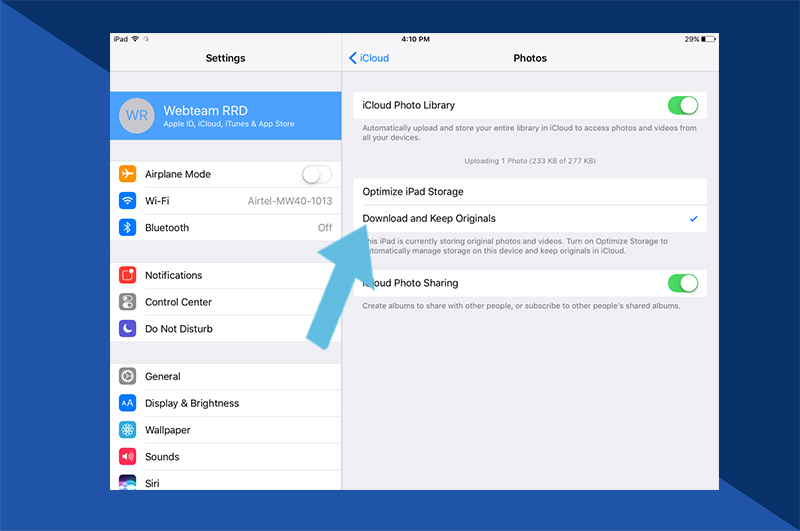
6. Select how y'all want to store your photos
Yous'll be given two options:

- Optimize iPhone Storage. Your phone will comprise optimized, lower-resolution versions of your iCloud photos while full-resolution (and larger file size) versions volition exist stored in the iCloud (and are accessible when you take an cyberspace connection)
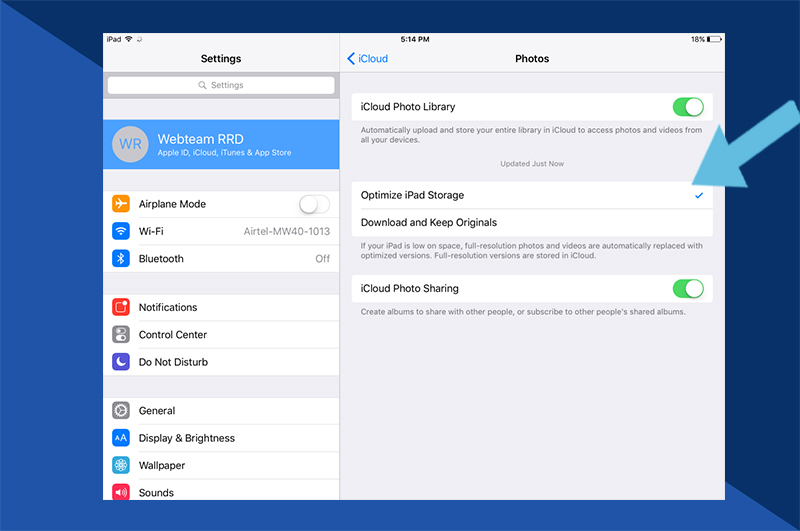
- Download and Keep Originals. This selection lets y'all download all your photos and videos in full-resolution. It ways y'all tin bask higher quality images all of the time, but it will require much more storage space.
7. Turn on Upload to My Photograph Stream
Select the slider to change it to green (if not already). Enabling this means all new photos and videos will automatically upload to iCloud whenever you're connected to WiFi.

How to upload photos to iCloud from Mac
To upload photos to iCloud when using a Mac, you but need to drag and driblet your chosen files into the Photos library. Whatever photos or videos saved here will be automatically uploaded to iCloud Photos. This can include photos captured by a camera, content saved from online, anything that's been shared with yous, and any other photos and videos in suitable file formats.
You lot can do this by opening up the location of your wink drive, hard drive, Finder, Downloads binder and simply dragging and dropping content. To do this, simply highlight the content you desire to upload and elevate into the iCloud Photos window.

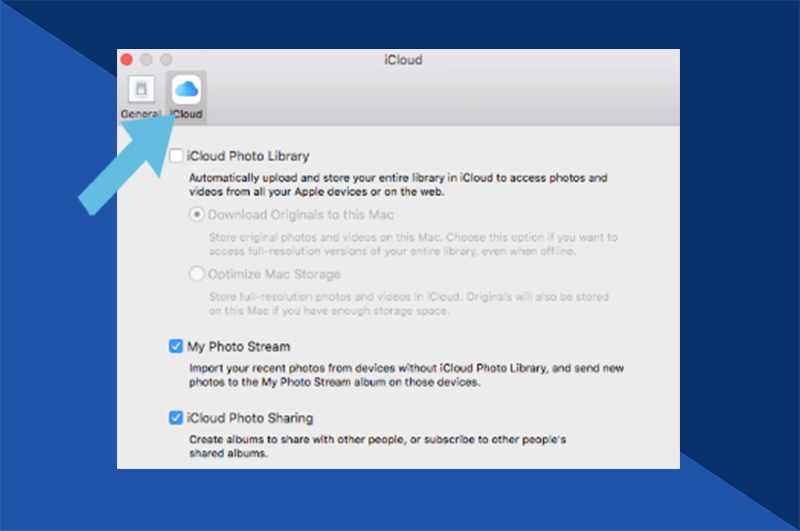
Showtime, still, you'll demand to make certain you have iCloud Photos turned on. To practice this:
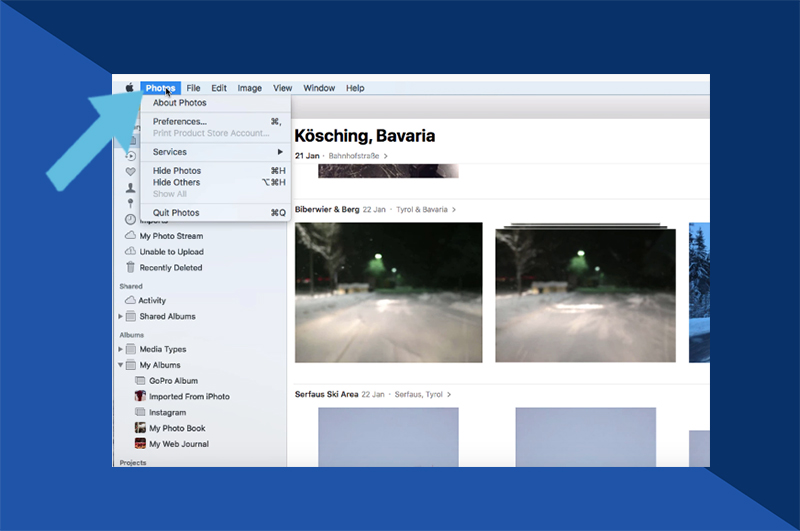
one. Open up the Photos app

2. Click on Photos in the bill of fare bar
Y'all'll detect this in the top left corner.
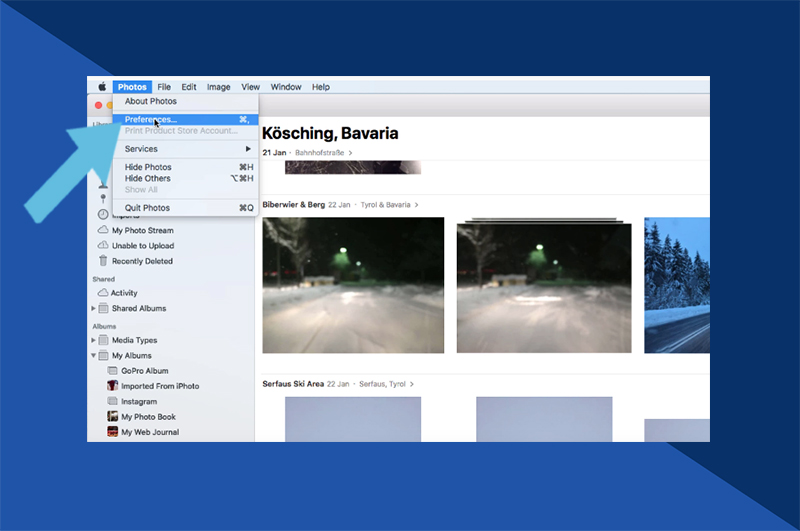
3. Select Preferences
4. Click the box next to iCloud Photos
v. Select how you lot desire to store your photos
You'll exist given two options:
- Optimize iPhone Storage. Your phone volition contain optimized, lower-resolution versions of your iCloud photos while full-resolution (and larger file size) versions will exist stored in the iCloud (and are accessible when you take an internet connection).
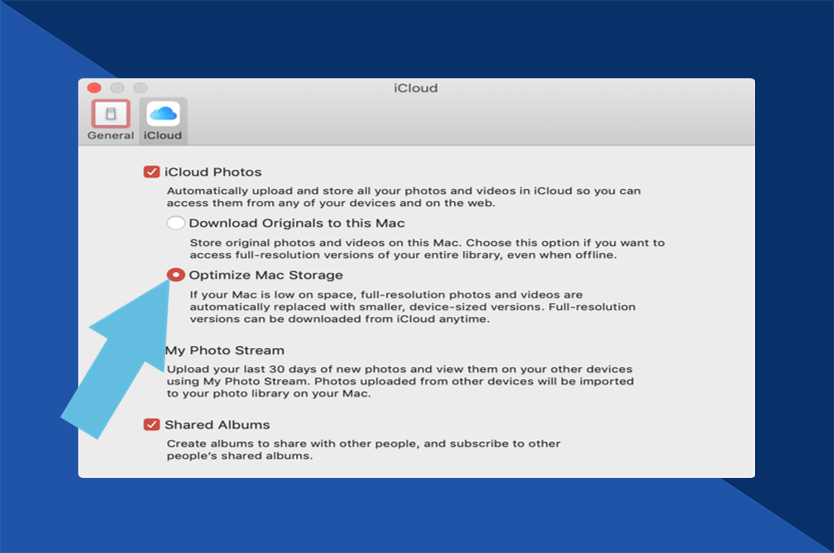
- Download and Keep Originals. This choice lets you download all your photos and videos in full-resolution. It ways y'all can savor higher quality images all of the time, simply information technology will require much more storage space.

How to upload photos to iCloud from Windows PC
You can upload photos to iCloud even when you're not using an Apple production. It takes a few extra steps but once you know how to do it, information technology can be simply as painless as uploading from a Mac.
1. Download iCloud for Windows
Visit Apple Support and download iCloud for Windows.
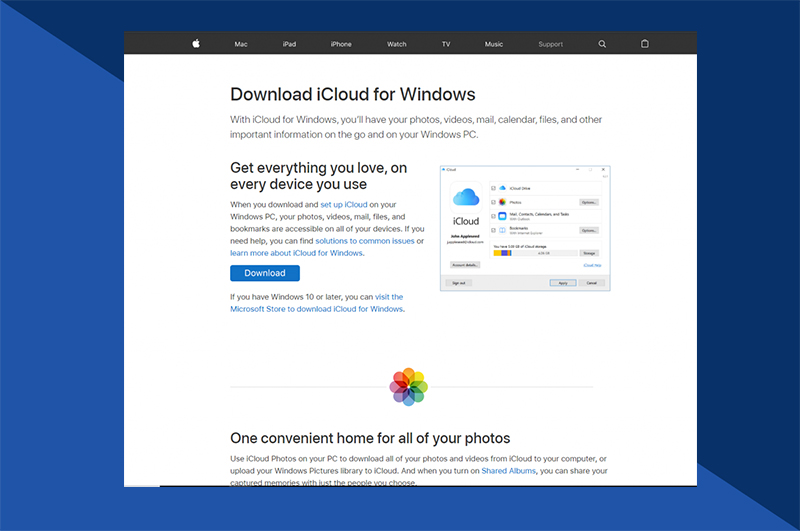
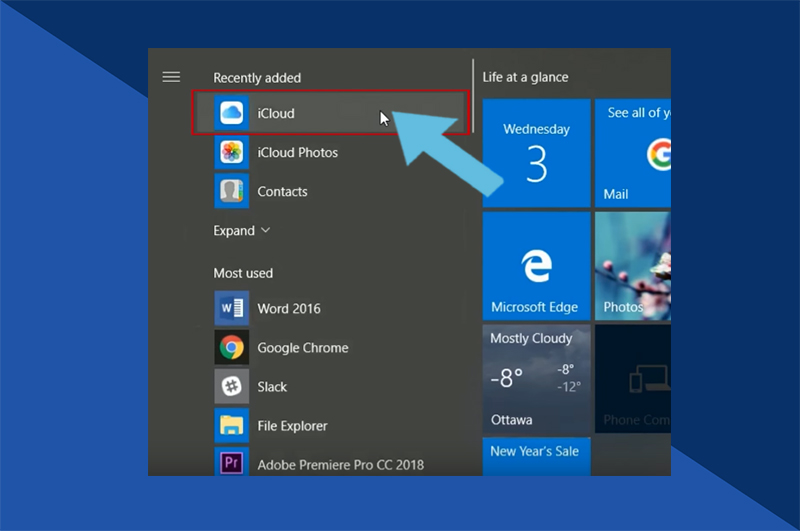
2. Open iCloud for Windows
Once installed, just launch the iCloud for Windows program.
3. Select Options

4. Select iCloud Photograph Library
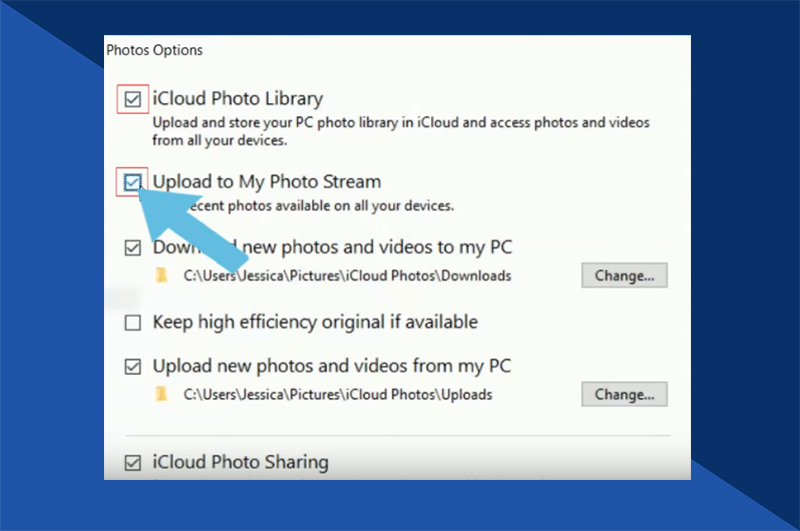
5. Click Done

half-dozen. Click Employ
This will set your preferences.

7. Enable iCloud Photo Library on your iOS devices
This gives permission to sync. You tin can likewise select what exactly you'd similar to share betwixt devices here, such as your Photo Stream, and whether you lot download and upload new images to your PC automatically. If you don't select an automatic pick, you'll only demand to follow the further steps below to upload individual images.

8. Open Windows Explorer
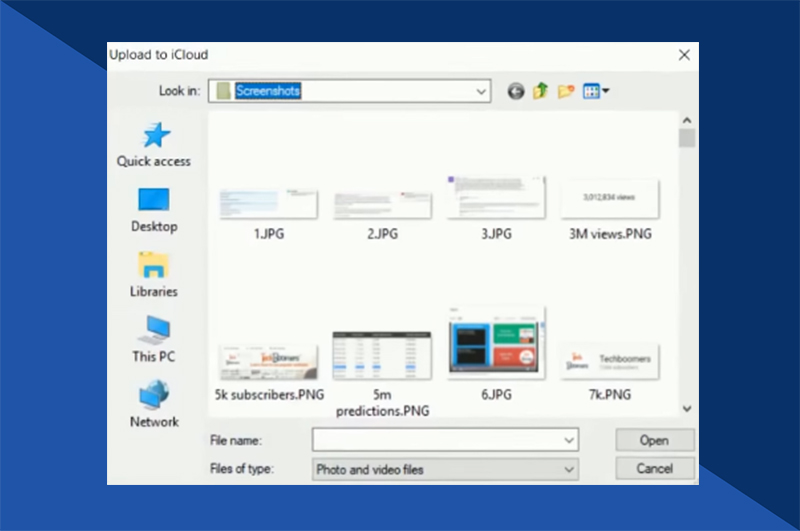
9. Select icloud Photos
10. Select Upload Photos

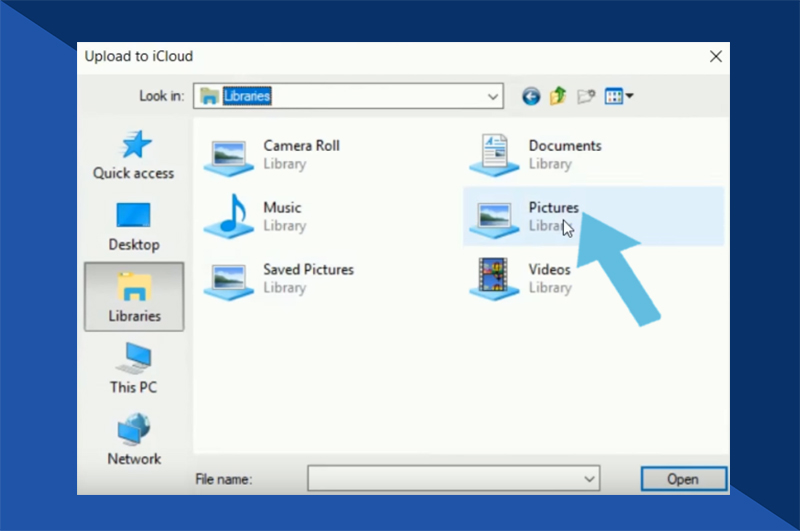
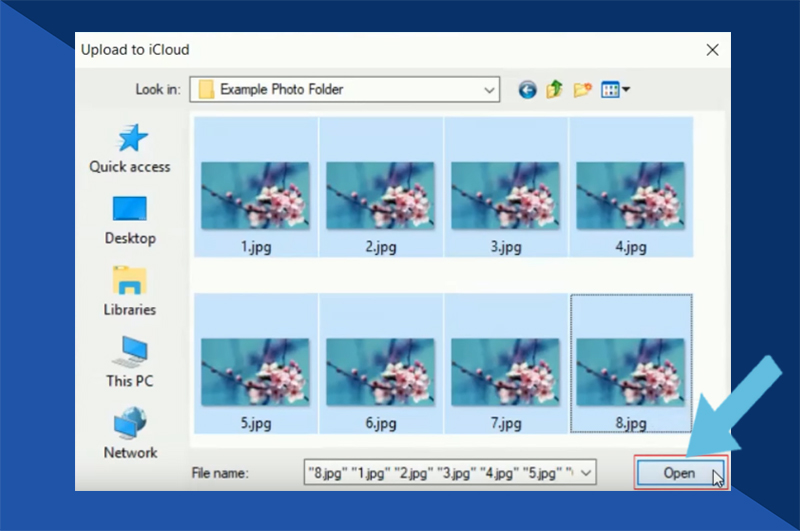
eleven. Select the images yous want to upload
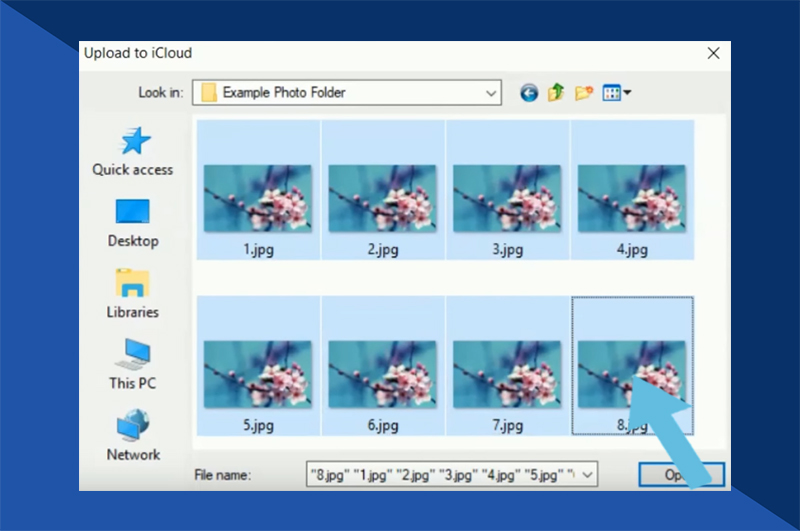
12. Select Open
Alternatively, you can use the drag and drop method. Simply drop them into the Uploads binder on your Mac. This is likely easier when you are uploading multiple images.
How to store your photos on your iPhone or iPad
As we've already discussed, you can choose how you store your photos on your iPhone or iPad dependent on your preferred image quality and storage availability.
Y'all'll be given 2 options:
Optimize iPhone Storage
Your phone will contain optimized, lower-resolution versions of your iCloud photos while full-resolution (and larger file size) versions volition be stored in the iCloud (and are attainable when you have an internet connexion).
Every bit the files volition be smaller, the transfer time betwixt devices will unremarkably be quicker, as well.
Download and Keep Originals
This selection lets you download all your photos and videos in total-resolution. It ways you lot can enjoy higher quality images all of the time, merely it volition require much more storage infinite.
This is particularly useful if you connect your device to larger screens as the original loftier resolution will exist suitable for that screen.
Why are photos not uploading to iCloud?
In that location are various reasons equally to why your photos may non exist uploading to iCloud. Ordinarily, this is caused past iCloud Photo Library non being enabled, running out of iCloud Storage, experiencing a network issue, or a login problem with your iCloud account.
These issues tin commonly be easily remedied:
- iCloud Photo Library is not enabled – Apply your iPhone or iPad to navigate to Settings > [Your Name] > iCloud > Photos and make certain the slider next to iCloud Photos is green. If information technology is, iCloud Photos is enabled. If it's non, only tap it to change color and turn information technology on.
- Insufficient iCloud Storage – To observe out how much infinite is bachelor on your device, go to Settings > [Your Name] > iCloud. Yous tin can choose to buy additional iCloud Storage if you like. Alternatively, you may desire to delete unwanted photos already in your iCloud.
- It's a network issue – Go to Settings > Photos > Cellular Data to cheque that you're connected to the net, whether this is via WiFi and Cellular Data. You can meet how stiff the indicate is hither likewise.
- Login problem with your iCloud account – Visit Settings > [Your Name] and hither you can see if you are logged into iCloud. If you've changed your Apple ID's password, y'all'll need to update your credentials here.
How long does it take for photos to upload to iCloud?
The length of time it takes for your photos and/or videos to upload to iCloud will depend on the amount of photos y'all want to upload and the speed of your internet connection.
If you lot have a large amount of photos and videos you want to upload, this may take longer than usual. You tin can meet the condition of this upload and break the upload for one day if you lot need. To do this:
- On your iPhone, iPad or iPod touch, navigate to Settings > [Your Name] > iCloud > Photos. Alternatively, become to the Photos app, select the Photos tab, and scroll to the bottom and click Pause.
- On your Mac, open the Photos app. Click on Photos in the sidebar, click Photos or Moments in the toolbar, curlicue to the bottom of your photos and click Break.
Create cute gifts with your iCloud Photos
Now that y'all've uploaded your photos to iCloud, you lot're able to access them on any device you cull. And from there, you tin choose to practice whatever you'd similar with them.
Transform your images into wonderful photo books and more with Motif.
What did yous think of this article?
- Author
- Recent Posts

A natural built-in storyteller based in NYC and the Catskills. Pairing stories with photos for safe keeping and telling.
pettigrewprephred.blogspot.com
Source: https://www.blog.motifphotos.com/using-icloud-for-your-photos-how-to-upload-photos-to-icloud/
0 Response to "How to Upload Selected Photo to Icloud"
Post a Comment